The Configuration Station – How to Use it
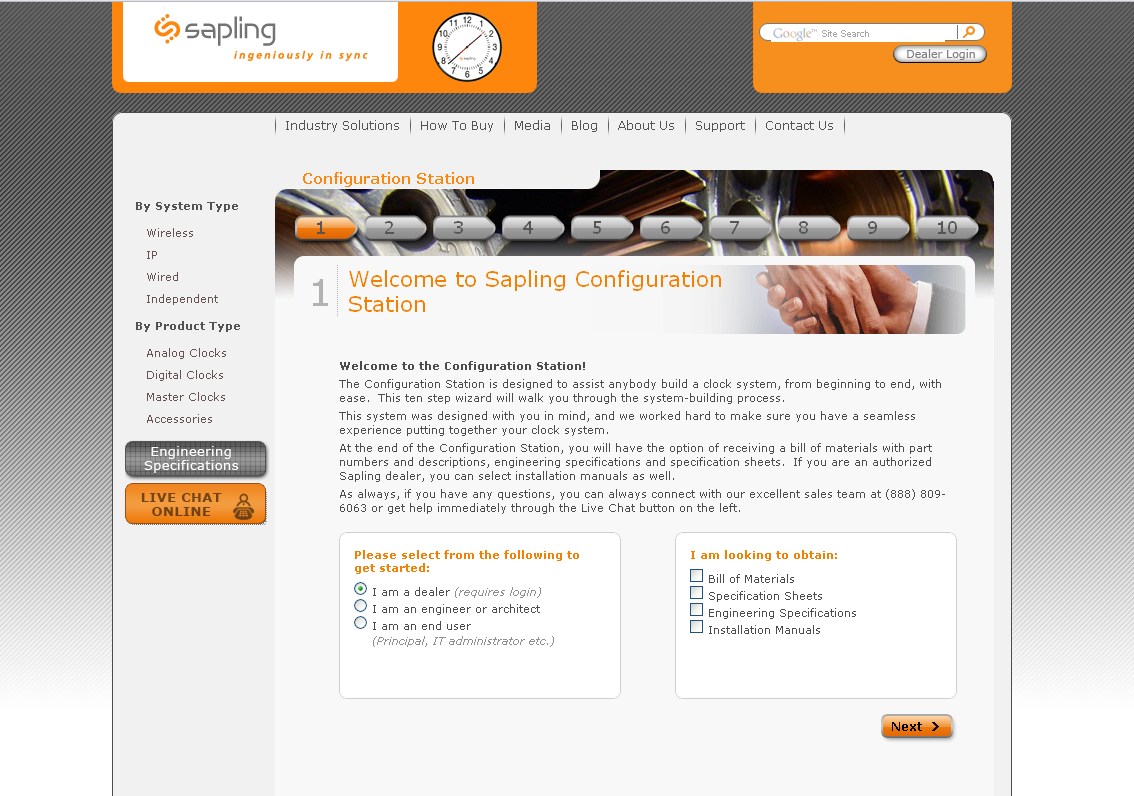
The time has finally come! Sapling is proud to announce the launch of the brand new Configuration Station on our company website. Beginning this week, visitors will notice a change to Sapling’s website. On the left hand side of the home page just above the Engineering Specifications and Live Chat feature, Sapling has added the new link for its Configuration Station, designed to help architects, engineers, dealers and end users build a custom wired, wireless or IP clock system step-by-step. By using the Configuration Station, users will get an easy, systematic walk through and description of Sapling’s various products and solutions and be able to select the options that work best for their individual building projects. At the completion of the tenth step an email will be sent to the user, providing them with a compilation of the corresponding spec sheets, manuals, and bill of materials for their built-to-order clock system.
Sapling designed the Configuration Station to better inform those unfamiliar with our products, streamline the buying process, and decrease the lead time for customers. In order to get acquainted with this new purchasing capability, below is a walkthrough of the Configuration Station’s ordering process for Sapling’s wired, wireless and IP clock products. Take a look and be on your way to creating the ideal clock system for your facility!
THE CONFIGURATION STATION—10 STEPS TO CUSTOMIZING YOUR WIRED, WIRELESS OR IP CLOCK SYSTEM
Step 1: To begin, please specify whether you are a dealer, engineer, architect, or end user requesting information on a synchronized clock system. You must also specify which documentation you would like to receive regarding your completed custom order. You may choose from a bill of materials, engineering specifications, installation manuals (dealers only) and specification sheets.
Step 2: In the second step, the user is presented with a selection of Sapling’s systems. Those looking for additional information may view each system
type in detail upon clicking “learn more”. When ready, the user must select which system they would like. You may choose from a wireless or IP clock system, as well as a 2-wire digital, sync-wire, or RS485 wired system.
Step 3: Here, you must select the master clock model (optional for IP clocks) and any extra capabilities you would like to accompany it. This is also the point to select any additional accessories you may need for signal coverage if choosing a wireless system, including wireless repeaters or network repeaters.
Step 4: At this stage, the user will be asked to select the round analog clock(s) they would like. You may choose between sizes, single or double-mounts, various dials, case colors and clock hands (coming soon). There is also a live render of the clock so that you can view exactly how your wireless, wired or IP analog clock will look with the options you choose.
Step 5: This step is exactly like the previous step but for square analog clocks (coming soon), rather than round analog clocks.
Step 6: Now you choose the specifics for all digital clocks desired for your system. Choose between 4 or 6 digits, 2.5’’ or 4’’ digit heights, or whether you’d like elapsed timer or interfacing capabilities.
Step 7: At this point, you may choose any additional accessories you require. Your options include transformers and converters for wired systems, PoE injectors for IP clock systems, and mounting brackets and wire guards.
Step 8: Review a summary of your order and make any changes necessary.
Step 9: At this point, you may enter your contact information so that Sapling can reach you to follow up promptly on your order and email you the documentation. Create a password so that you can login as a returning user for future systems you’d like to build and skip filling out contact information repeatedly.
Step 10: You have completed your customized synchronized clock system order. There will be a link to immediately download the documents you requested in step one. You have successfully prepared your wired, wireless or IP clock system without the hassle of figuring out the right part numbers or accidently ordering something you don’t need.
After your first system configuration, do not hesitate to stop back and create another. The Configuration Station is here to help you work toward finding the just the right system for you facility! To read more about The Configuration Station and the benefits it provides for its users, click on this link

