Tech Series: Setting up the Web Interface for Sapling’s SMA 3000 Series Master Clock
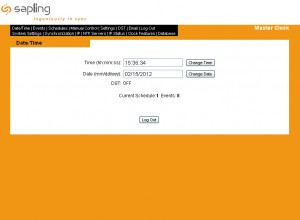
For the many facilities and users that have implemented Sapling’s Master Clock System, very few tend to opt out on the web interface option. What is the web interface? The master clock’s web interface is something the Sapling engineers created to make life easier for the user. It allows the one in charge of maintaining the master clock to access the master clock’s settings and configurations from any remote location—as opposed to making all changes manually on the master clock’s keypad. By using any web browser on the computer, the user can pull up the web interface and make changes to the many different facets of the master clock. For instance, the user can change bell schedules, server settings, Daylight Saving Time adjustment, and many other settings that normally would require visiting the actual location of the master clock within the building. Provided below are simple instructions on how to get Sapling’s Web Interface up and running so when you purchase your Sapling SMA 3000 Series Master Clock, you too can take full advantage of the remote programming and control of the web interface.
1. Connect the master clock to the network
With the master clock out of the box, all packaging removed and powered up, you can now begin installing your master clock onto your building’s network. This is accomplished by locating the Ethernet port on the back of the master clock and an open Ethernet port on the switch or router in you technology or control room. Take an Ethernet cable (not provided with the master clock) and plug in both ends to the master clock and the switch or router. The master clock is now actively communicating on the network.
2. Retrieve the IP address of the master clock
On the master clock’s keypad, locate the “9” and the “1” button and press both of them at the same time. On the LCD screen next to the keypad, the master clock’s IP address will appear. Jot down this number because you will need it later.
*Now, on from the master clock and onto the computer*
3. Open the web browser of your choice
Now that you are on the computer, select your preferred web browser. Sapling’s Web Interface works with any of the following: Internet Explorer, Mozilla Firefox, Macintosh Safari, Google Chrome.
4. Enter IP address into the browser
With the chosen web browser now up and running, click on the browser’s address bar to begin typing. In the address bar, type out the IP address that you jotted down earlier at the master clock. After pressing enter, the browser will pull up the master clock’s web interface login screen. For users, the default password is 6063.
After successfully logging in, you can now take advantage of the capability of the web interface. No longer will you have to stand in front of the master clock and make every configuration manually. The web interface is faster, more convenient, and also allows you to make changes to your master clock’s settings on the fly compared to local programming. It’s Sapling engineering like this that makes keeping accurate, synchronized time easier than ever.

