Tech Series: Setting Up a Bell Schedule on the Web Interface with Sapling’s Master Clock
When schools decide that they need synchronized time within their building, many of those schools don’t stop at just the clocks. One of the greatest advantages of implementing Sapling’s Synchronized Clock System is having the ability to sync the bells that signal class changes with the accurate time of the master clock and all other wall clocks in the building. Through simple programming of the SMA 3000 Series Master Clock, a school can set their bell schedule on the master clock’s web interface, allowing the master clock to control each and every time the bell rings. This means that when the clock reaches 8:30am for the first class of the day, the bell will ring at that exact moment. No more are the delays between the clock’s time display and the ring of the bells during a class change. If you do decide to implement this kind of capability in your school facility, below is a quick walk-through outlining how to create a simple bell schedule for your building.
1. Login to the web interface
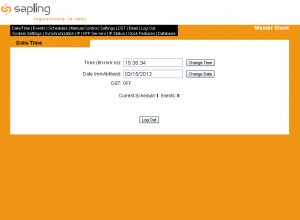
Start by logging in to the web interface using your preferred browser. For setting up the web interface, please visit this link. Pull up the web interface in your browser by typing you master clock’s IP address into the address bar. At this point you should see the web interface login page, showing a password box in the center. The default password for logging into the web interface is 6063. Type this password into the password box to move on.
2. Add an event
Now that you’re logged into the web interface, locate the tab labeled “Events” and click on it. This will bring you to the Events page, where you can add all your events set to ring the bells. When setting an event, you are simply telling the relay or “zone” on the master clock to open or close, which triggers the bells to ring. To begin setting the bell schedule, click “add a new event”. The new page that pops up will display the necessary options to create the bell schedule. First, select a schedule to for the bells. Generally this will be “schedule 1”. Then select a time for the first event. This would be the first time that the bell rings in the morning. Next, select the zone that should be used to trigger the bell for this event. The zone is the actual relay on the master clock that triggers the bells. In this case, we’ll just say there is only one zone used for the entire bell system. Zones have the option to be set to ring the bells for either three or five seconds—choose your preference. After that, select the days you want this bell to ring (in most cases, this will be Monday through Friday). Next, press “submit and continue”. This will save the event you just created. After creating your first event, repeat the process until you have created an event for every time the bell rings throughout a normal day at the school.
3. Setting an alternate schedule
In many cases, a school must switch from their normal bell schedule to an alternate. For example, due to inclement weather, a school might undergo a 2-hour delay. When students arrive two hours late, class schedules will need to adjust, and therefore the bells will have to ring at different times. With the web interface, you actually have the option to create that bell schedule for the 2-hour delay, and implement it whenever necessary. Simply repeat the above steps in “add an event”, creating events for the times the bells should ring during a 2-hour delay, except this time, create these new events under schedule 2. This way, you’ll have a different sequence of events for the 2-hour delay. After creating 2-hour delay bell schedule, you have two options to implement it. First option is to schedule the change between schedule 1 (normal bell schedule) and schedule 2 (2-hour delay bell schedule). This can be done under the Schedules tab. Simply click on the tab, select Schedule 2 to switch to, set a time and a date for which you want the schedules to change, and click submit. The other option is done through the Manual Control tab. Simply click on the tab, select Schedule 2 to change to, and click submit. Schedule 2 will immediately begin operation.
This capability of the master clock can be used in many different applications and facilities. Hospitals can schedule lighting schedules for parts of the building not currently in use. Factories can use the scheduling software to regulate break time of employees. However, one of the most common applications of the scheduling software is the school bell schedule. Through engineering and development here at Sapling, we have created an easy solution for schools that have varying bell schedules. With Sapling’s SMA 3000 Series Master Clock, schools can always count on keeping organization within their schedule.

